I have been after a ‘superzoom’ bridge camera for a while, looking at various models such as the Canon SX50HS and the Panasonic Lumix FZ200 and the almost DSLR like Samsung WB2200F, but each of these had compromises, trade offs that I wanted all in one camera.
Then came along the AZ651 PIXPRO press release from Kodak (well JK Imaging Limited under the name of Kodak)…
I was intending on buying it mid June but found out Dixons were holding UK stock back until September so after chatting to Kodak, one thing led to another and they sent me one for review!
Here’s an unboxing video, note the fact only a quick start guide is included, Kodak have told me that there will be one available to download from their website when it is launched but it is not included on the bundled software.
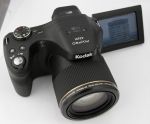
It looks like a pretty good superzoom (Kodak call it an Astro Zoom but I’m running with superzoom). Kodak have had some random designed bridge cameras before, but this one looks on par with other bridge cameras. It is nice to hold, has a large deep front grip and the lens also has a good rubber grip which you can rotate for zooming in and out or switching to manual focus.
The rear thumb rest is positioned well and the back buttons are nice and flat so will avoid being pressed by accident. The flip-out LCD screen can be positioned flat against the body so the screen is protected when viewing through the EVF (Electronic View Finder). It can also be swiveled out into the usual positions including the (god forbid) ‘selfie’ position (although you would look like a bit of a twerp using this as a selfie camera!!).
Now the plastic body, feels like, err, plastic! It’s the type you could mark easily, matte in feel, it doesn’t feel like it would take a drop in its stride. I have got used to it after about a week of using it and the rubber areas do sit well.
It does have a good weight to it though, there are many superzooms out there that are too light, this isn’t exactly heavy but you need a bit of weight to help stable the camera when zooming.
While we are on the feel of it, when the pop-up flash pops up, it does with quite a clunk, a bit of dampening in the springs might have been favoured but when you pop it back down, it does give a bit of a ‘tung’.
Now we move on to the EVF. The first thing I note is there isn’t a Dioptre (eye focus control), so those with glasses might struggle. The actual EVF is on par with the Sony H400 but miles away from the Sony DSC-RX10 which looks like you are viewing a HDTV! But then the RX10 only goes up to 200mm.
The EVF comes into its own outside. Whilst you can turn the LCD up to gain a better view in the sun (which is perfectly viewable too), if you are doing any mega zooming, it’s a darn sight easier doing it through the EVF and if anything, having the camera in the natural DSLR type position gives it that little extra stability.
When you take a photograph whilst viewing through the EVF, the image appears with just a tiny 1 second or less delay. Using other bridge cameras, there are a lot longer waiting times than that out there (I am using a Sandisk 45MB/s SDHC card for this test). You can then set the quick view to last between 1-3 seconds immediately after capturing the image. There is a button to the right of the EVF which switches the viewing screen too and from the EVF and the rear LCD, this can also be done manually by closing the LCD and it will switch to the EVF or vice versa when opening the LCD screen.


After the EVF comes the LCD Screen, a nice and big 3 incher that can be twisted round and folded back to save the screen from being damaged. In my search for the perfect superzoom I wanted an articulated LCD screen, one that did more than tilt up and down, but could twist right out and face you if you are doing a video to camera.
The Kodak ticks all of those boxes. It is nice and bright but you have the ability to increase (or decrease) the brightness by 3 stops and this makes a lot of difference in sunny conditions. When you place the LCD (forward or backward facing) into the back of the camera (its natural position) you hear a reassuring clunk and it is slotted into place and wont come loose unless you pull it back out again.
To the right of the LCD screen are the majority of the function buttons. All but the record button are flat against the body and have a good ‘click’ when you press them. They aren’t easily pressed by accident but are easy to do so when intending on doing so. The record button for quick video action is located next to the thumb rest and is protruding out by about a millimeter encased within its own volcano like crater protecting the button again from an accidental knock. It is placed well and can easily be switched on by your right thumb. (Lefties may have to juggle the camera or leave it in movie mode, which means the shutter button becomes the record button).
The rotating dial that allows you to scroll through the menus is quite cheaply made, but easy to move and works’ as it should.
The buttons on the rear include:
Quick record – Menu – Function dial (with quick access to Macro, AF, Flash and Timer/Delete) in the centre of the function dial is the ‘Set’ button – Play and Display.
There is also an ‘i’ button, now I am thinking this is for information, but I have tried pressing it at various menu stages/scene modes without success. Looking at the Quick Start Guide, it gives you the name, ‘i Button’ and as there is no manual we might as well call it the inconclusive button!


Up on the top of the camera we have the mode dial including the following:
Auto – Program Auto Exposure – Shutter Priority – Aperture Priority – Manual – Face Beautifier (hmm) – Wifi – Scenes – Movie – Custom.
To the left of the mode dial is the on/off switch, again flush with the body and between the shutter button and the mode dial is a quick button to the frame shooting mode (different selections are available in different mode dial positions). To the right is the exposure compensation button. Again, depending on the mode dial position, using the function dial, you can change shutter speed, aperture, ISO and exposure value.
Then you have the shutter button and the zoom rocker. The rocker has a good amount of spring back and feels nice in operation.
Above the EVF is the pop up flash, this can only be opened when triggered by the camera and cannot be opened manually (there is no push button or latch). The stereo MIC is built into the top of the flash and on the left of camera there is a speaker for video audio/annoying camera action audio. There is also the WiFi logo in front of the rubber EVF eye-cap.

Just in front of the speaker on the lens is a switch called the ‘Lens Function Ring Lever’ and has the option of Zoom AF/Smart/MF Not quite sure what ‘smart’ is supposed to mean but in practice the Zoom AF was a little quicker to focus.

The bottom of the camera has the battery/SD holder and a tripod screw point. And serial number, mine seems to be numbered (after many zeros) ‘15’ so I expect it is one of the first ones to have been made.
The camera battery BTW has to be charged inside the camera, whichever fool came up with this idea should have a stern talk to themselves! If I want to buy a second battery for a holiday, I don’t want the camera to be out of action whilst charging and I don’t want it to be on the floor/table top with a (short) USB trip wire attached which could cause a nasty accident! I’ll be waiting for the Chinese to be bringing out a third party charger then.
Now lets get on to actually using the camera as a camera!!
So first lets start off with the display of the LCD screen, there is a lot going on here although you can press ‘DISP’ to get rid of it all and it will just show you the bare essentials at the bottom. The quick menu is easy enough after a couple of rounds and the set up menu further in isn’t complicated. What can be said is there are plenty of different settings to choose from, far too many to go into in a review and something to be tested over time. Again, depending on dial mode, your quick menu gains more or less features.


Something I noticed when playing with the digital zoom (sometimes 1560mm isn’t enough lol) is that if the digital zoom is switched on (accessed through the set up menu) then the ability to shoot RAW is disabled.


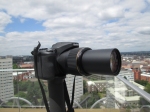
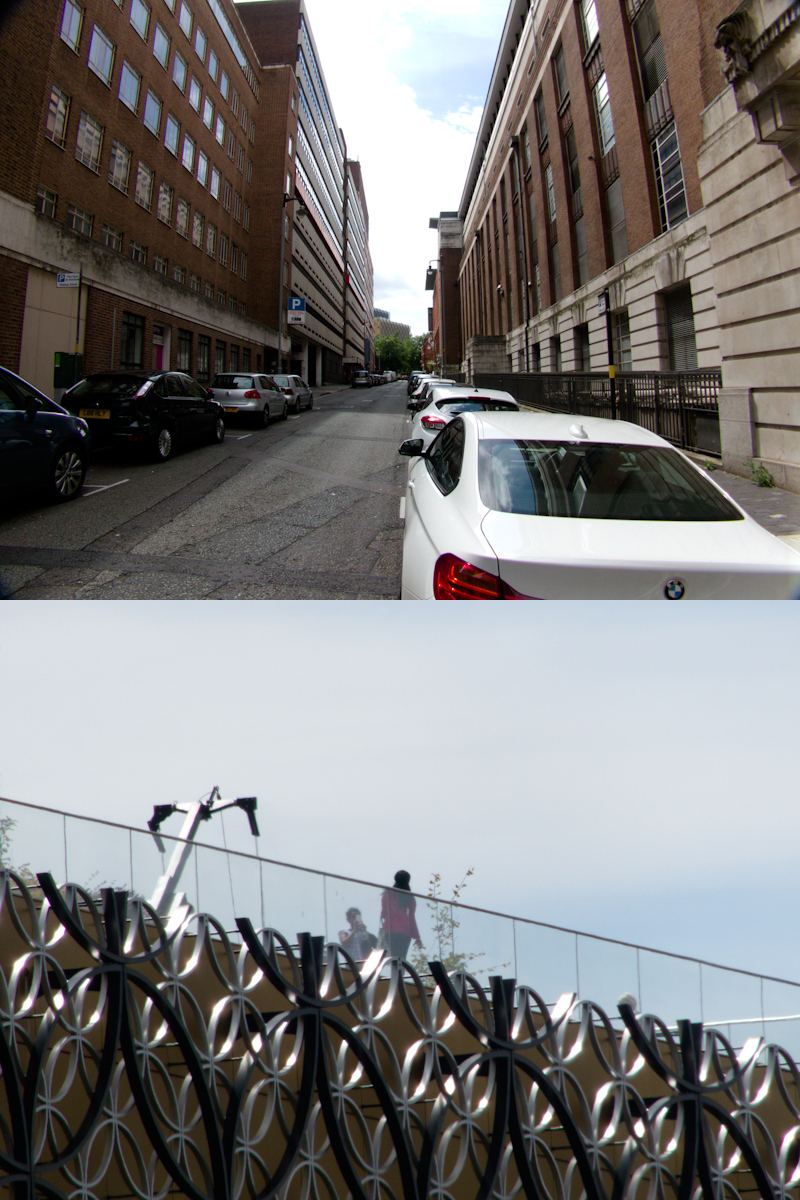
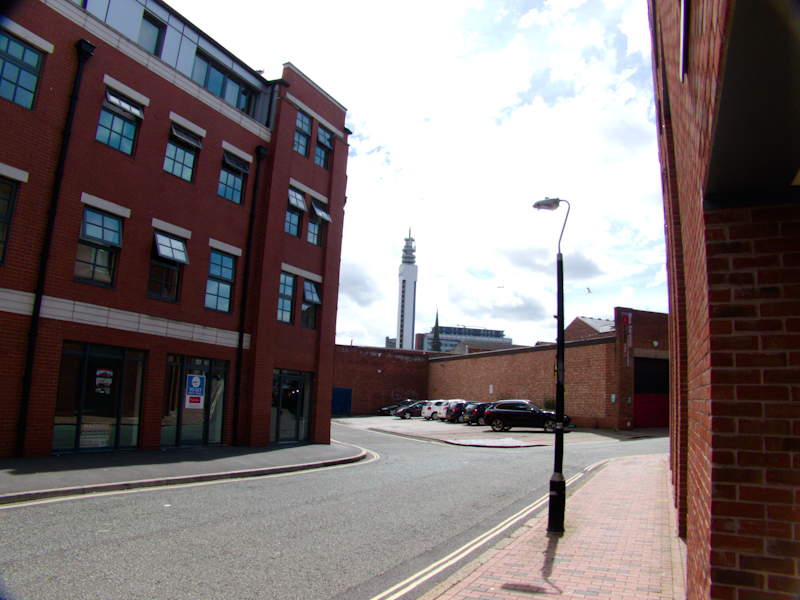
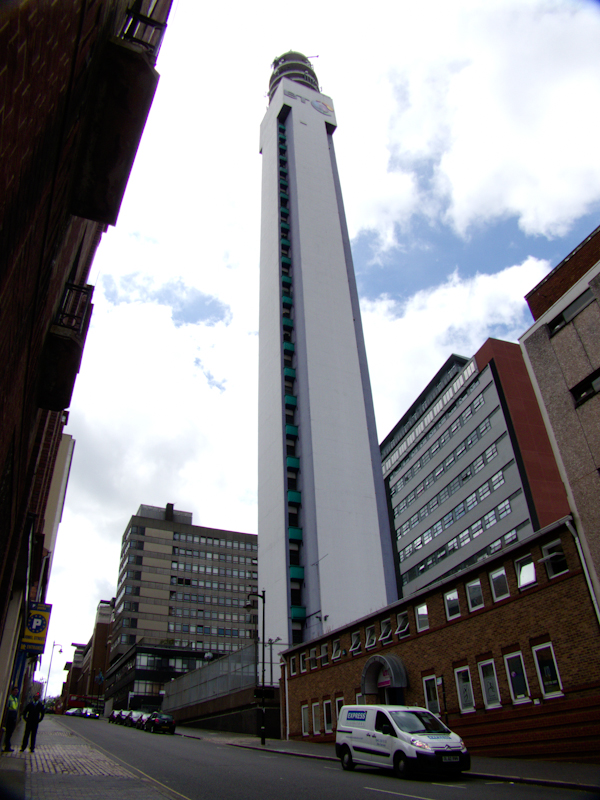
As we are talking about zoom (65x Optical), this is probably the reason most people are buying it, so I did a test, I took the camera up the award winning Library of Birmingham to one of the garden viewing areas high up with great views across the city. Now many people will say, you sacrifice quality with cost, which I agree with, My Nikon D7100 and my Sigma 120-300mm F2.8 lens produces stunning pictures, the D7100 has a built in crop thingy which adds to the already cropped sensor making it about a 2x magnification so the 300mm becomes the equivalent of a 600mm, which is pretty darn good. HOWEVER, the lens weighs a tonne, coupled with the camera, it weighs even more, and you have to carry around a backpack/camera bag, the lens has its own bag (as it’s just so huuuge) and a monopod for good measure.
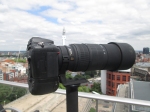


Not exactly holiday friendly! Let alone pocket money friendly, the D7100 cost about £1000, the lens (second hand, many years old and no vibration reduction) cost £750 and the monopod was about £70.00. Kodak have confirmed the price of the AZ651 will be £249.99 so this is actually well priced compared to the competition and a damn sight cheaper than the (semi) pro route!!
So, as I said, I took both cameras up to the top outside viewing platform and put them through a quick video test.
Now obviously the D7100 is a manual zoom so it wasn’t exactly smooth, also the fact it was fixed to a monopod and had no VR/VC/IS also made it a bit rocky, but the AF was quick enough and the end result was nice and sharp. That said, due to the enormous magnification, especially if I am shooting in the crop mode, the camera is starting at the equivalent of 240mm comparing to the Kodak’s 24mm, well the difference is massive.
So we move onto the Kodak. I initially used it on the monopod to do a like-for-like video, in the later videos I used it handheld.
The zoom could be better made, it hunts for focus quite a bit, there is a video I took of a pigeon (below) and when people walked in front of it, the camera did a weird back and forth ‘dance’ to try and get focused again, you could feel it through the barrel and see it on the video but there is no sound of any movement, which is fortunate. When it is in focus though, it looks pretty good. Good natural colours too, not too warm.
In regards to the focus, as I said, it tends to hunt at the furthest reach, so you have to come a step back (in zoom) so it has a chance to lock onto a subject, then you can zoom in. I zoomed in to a woman waiting for a bus about half a mile away, after it’s initial focus flapping it showed her quite well.
What must be added is zooming to full reach (the action itself) in stills mode is actually quicker than the movie mode and it locks on to the subject very quickly, shame it couldn’t be the same as movie mode.
A few other things about the zoom, it will go out of focus a few times during the zoom action, it’s not a mega fast zoom and the AF could be quicker (in movie mode), but then again Kodak don’t have a big lens company such as Leica or Carl Zeiss helping them. Also, when you zoom, it muffles the sound. It doesn’t mute the sound but muffles it, this is annoying but I suppose better than muting it all together.
The zoom reach itself, there is only really one word I could think of to describe it, that being ‘ridiculous’. It is simply stupid how far it can reach and after getting past the focus issues, it doesn’t do that bad. The vibration reduction could be a little improved but then again we are talking 1560mm here, which is simply impossible to handhold if using it in a DSLR set up (unless your dad is Hulk Hogan and he had an affair with Mrs Stretch Armstrong so you had massive bulky arms to hold an 800mm lens (with a 2x converter).
You actually find yourself trying to take pictures of things you don’t usually see, or actually need photos of!! Planes, small cows (far, far away), people standing on balconies. I suppose it would be good if you went on safari and didn’t want to be in an elephants face, if you were watching sport high up in the heavens with the cheap ticket holders or if you’re a spy lol…


[August 2014 Update:]
During my time with the camera, a couple of ‘Supermoon’ events have passed, one the clouds scuppered the chance of seeing it, but in August, the clouds parted, below is a sample image and video test. You can fully zoom into (incl. digital zoom) 260x for stills and 65x for filming (optical, no digital allowed during filming).

You don’t actually have to use the far reach all the time though, it is a perfectly good camera at the wide setting of 24mm or even the in between range. It is actually a pretty good all round camera when you have a normal go with it.
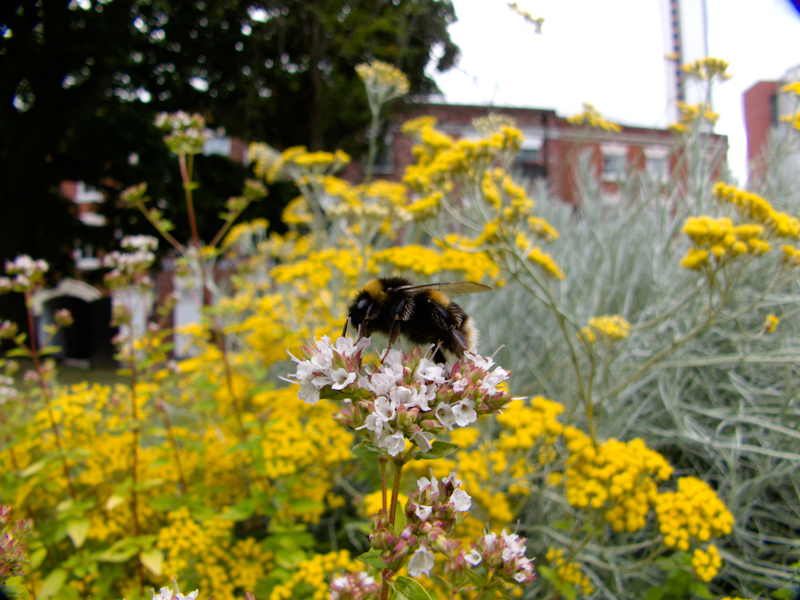
I went out on day 2 with it and got up close and personal with a few bees collecting nectar, close focus is about 3cm, which means you aren’t prodding the wildlife. The images look good and the flowers aren’t blown out.


I have messed around with some of the scene modes including the panoramic (360) mode, which is easy and quick to stitch, the stitching looks good and smooth although it is only available in JPEG mode and is limited to a 2.5mb file. The resolution is a less than some high-end mobiles but is still quite fun to use.

HDR mode takes a quick succession of images and processes them pretty quick. I did the HDR images handheld and didn’t find a problem doing so in this way.
Here are a few examples:


Now you will notice that the HDR is subtle, which is what I like. HDR Should make the best of a tricky situation, not make it look unrealistic! Now I did pick a particularly sunny day in Southport but it did help to pick out the shadows and get a bit more toning. The images are straight from the camera, nothing edited. The camera outputs around an 900kb file to its edited HDR images. Please also note the jogger on the bottom right image, the series of images made to create the HDR image is quick enough not no make the jogger look weird!!
Noise / ISO Test.
To me, noise is quite an important thing, I do a lot of handheld work at night and evenings so it’s good to know what your dealing with. Below is the JPEG straight from the camera images from ISO100-3200.


The JPEG does tend to smudge the noise artifacts quite a bit towards the high end, but I have seen much worse.
Below is the RAW images (converted in Lightroom to JPEG).


The noise hasn’t any smudging in the RAW results, just a sand type grain, the images are sharp and detailed and very workable.
Final gallery below with a selection of pictures taken with the Kodak PIXPRO AZ651 Astro Zoom…


Conclusion
I have had the Kodak PIXPRO AZ651 Astro Zoom for about a week now, After you get past the niggles of the focusing during zooming and the not brilliant EVF, it is a pretty good superzoom, especially from a brand name that brought up the common remark of ‘do they still exist?’ when I showed the camera to friends! The body is well laid out and the feels good in the hand. The battery lasts a couple of days worth of shooting and doesn’t take too long to charge, inside the camera!!
It could do with having a slightly better image stabilizer for the sheer amount of reach, the EVF could be bigger and clearer and should have a dioptre (at least!).
The ISO in RAW is okay, not groundbreaking but good for its price and target audience. The fact it takes RAW pictures (DNG) that are instantly workable in years old versions of Lightroom is also a plus.
But for an overall bridge camera it is pretty good, now I can take pictures of oil rigs, spy on small cows (far, far away) and take low pictures without having to get intimate with the ants themselves!
It’s a nice compact beast that needs a little taming but once you get the hang of it, it results in some good images.
Any questions or comments, please leave them below.

Hi, your Review is very inforrmative as there is not much information on this camera about its actual performance since this is just new on the market. I am planning to get this camera but at this point I am split with this camera and the Sony HX400V. I want to ask you if the lens ring on this cam can be used to manually zoom in like standard DSLR’s?
LikeLike
yes it can be used for zooming.
LikeLike
So do you prefer it over Canon’s SX60 HS?
LikeLike
I am afraid I have not tried the Canon bridge camera.
LikeLike